Landscape Lesson in One Point Perspective
This perspective art lesson was so successful and I owe it all to the blogs Deep Space Sparkle and Smart Class. These drawing steps for one-point perspective are so perfect that I didn’t change a thing! Thank you for sharing! So many thoughtful creative art teachers out there!
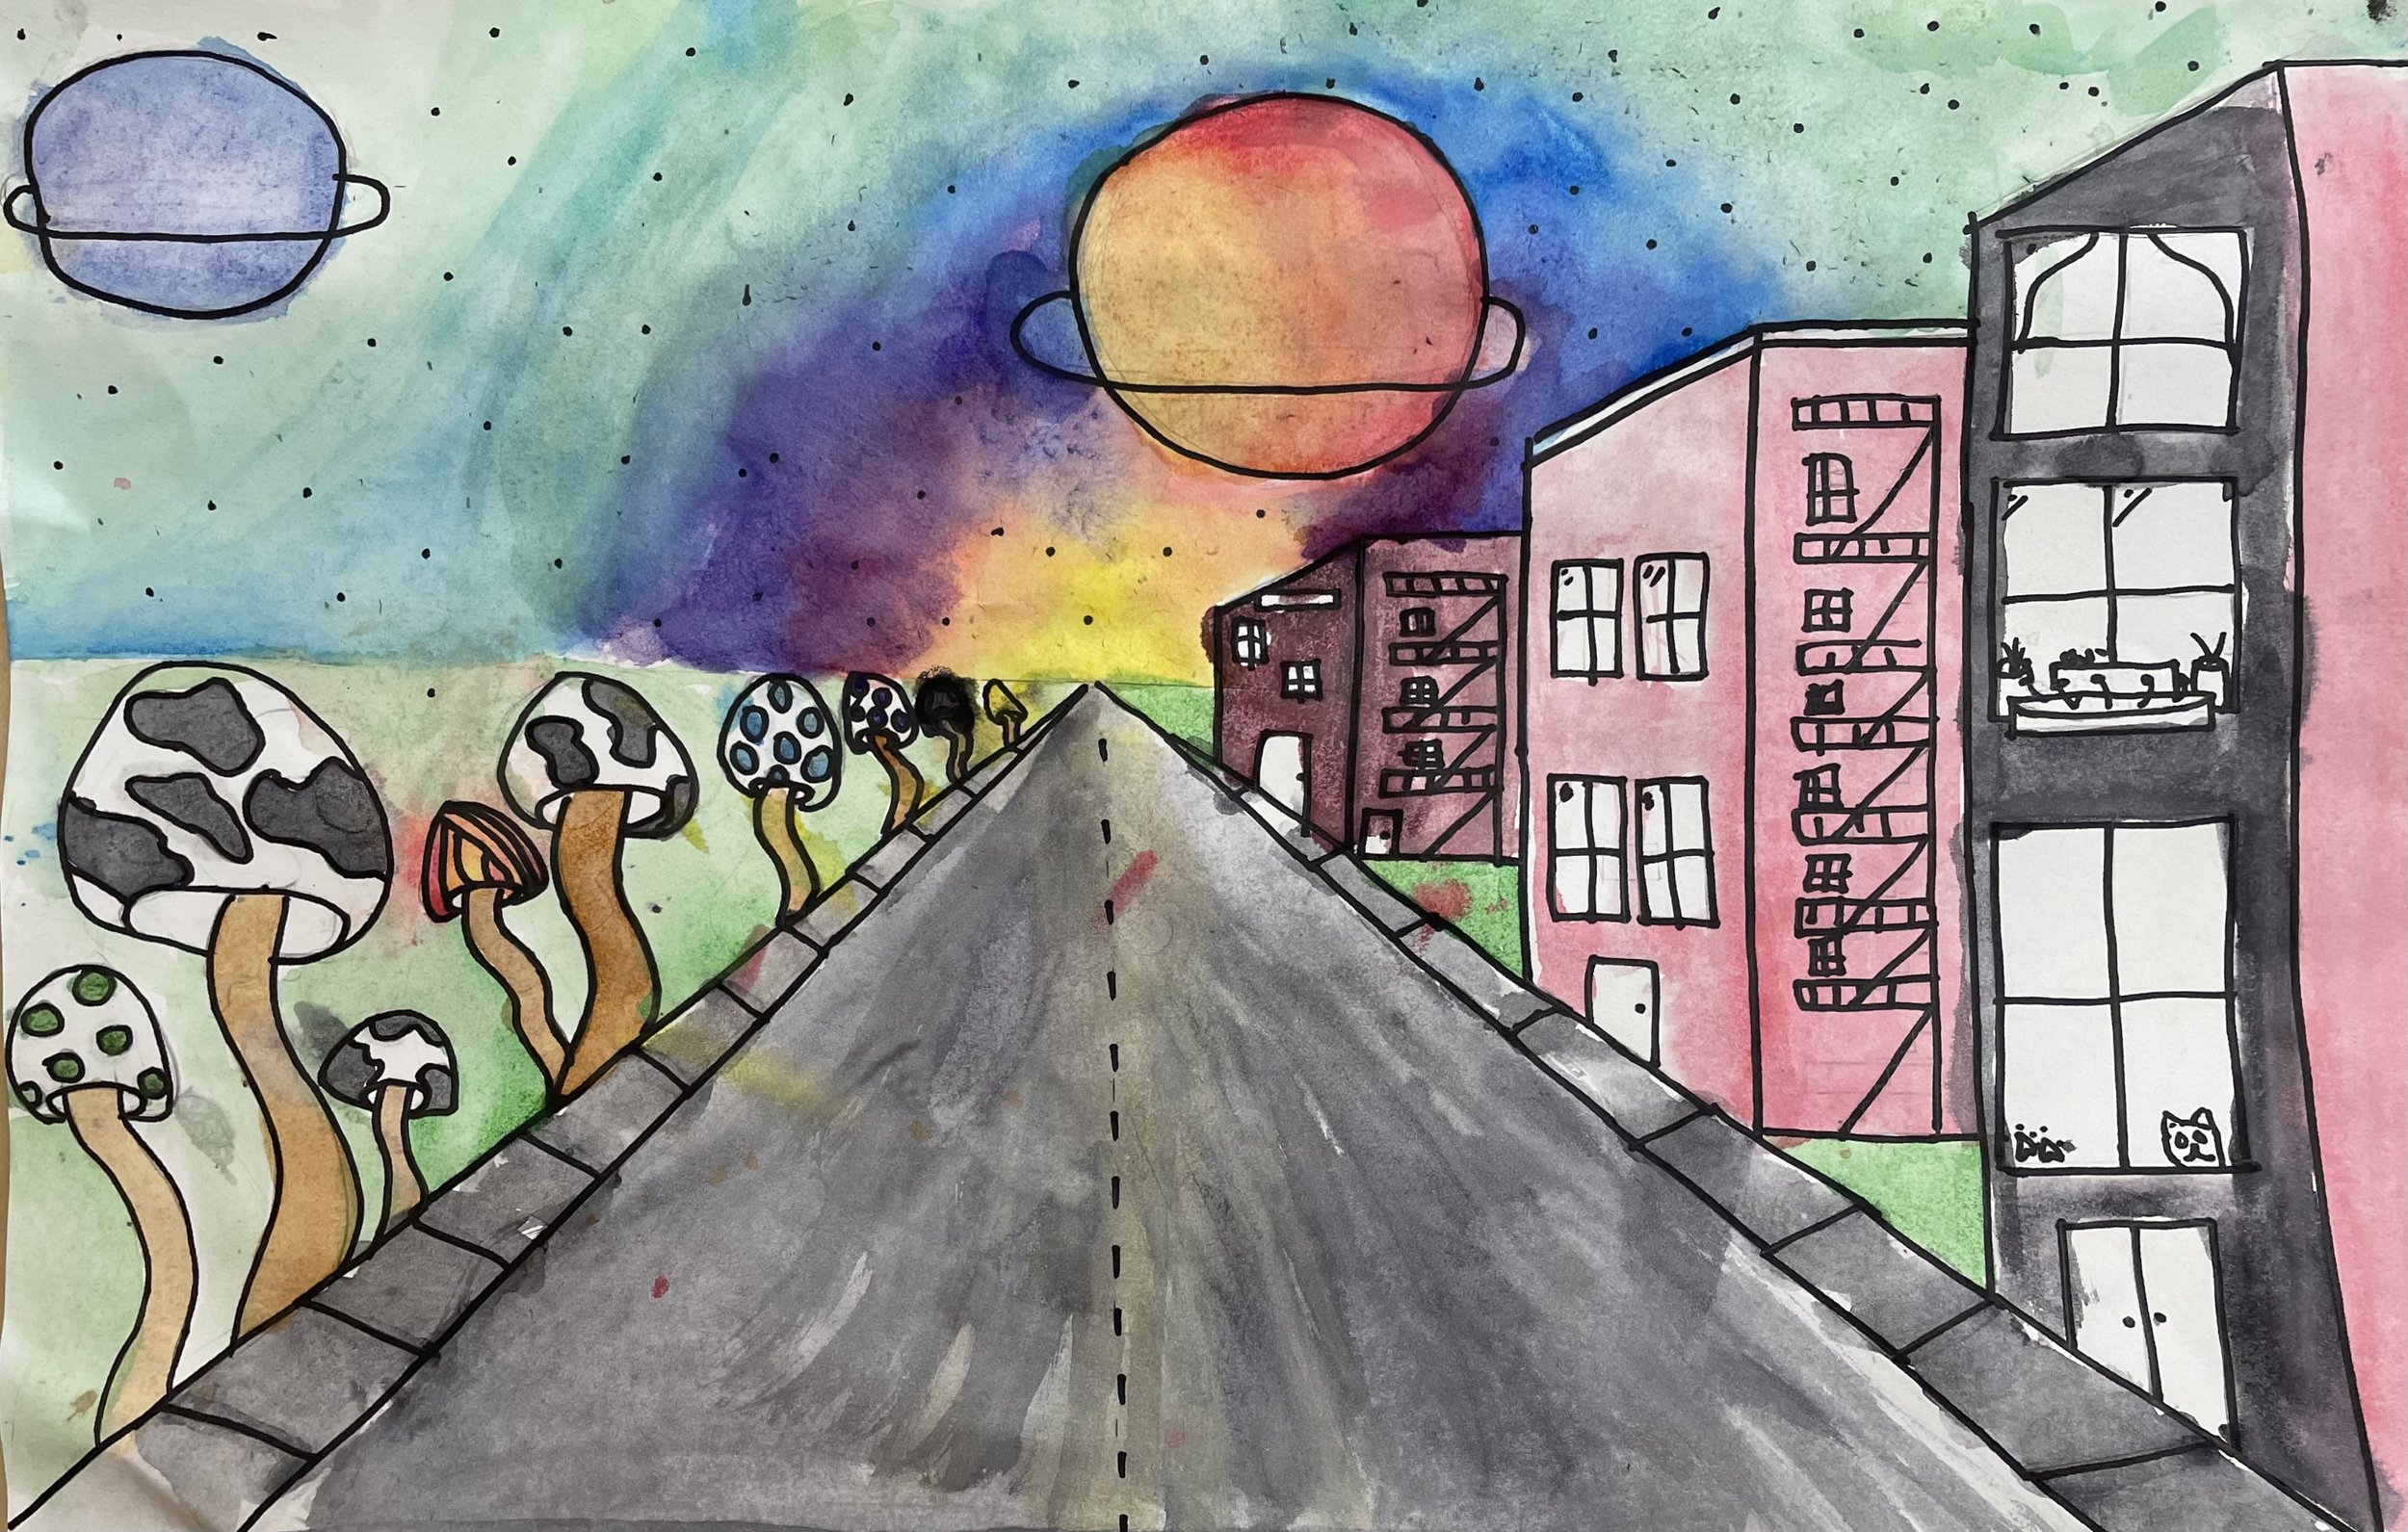
My students LOVED this lesson. Perspective can be pure magic for students who are eager to learn more about drawing things that appear to be 3D! This lesson is part math and part creativity, and uses specific rules that really work. Students discovered principles like using the “horizon line” and a “vanishing point” as tools to help guide us as we worked through this lesson. About half of the upper elementary classes finished this lesson in three, 50-minute sessions. The other half need an additional class period of 50 minutes to finish up.
This lesson also works great for middle school students who are eager to draw things more realistically (especially if it’s for the very first time) as this lesson can be a huge confidence builder!


