Clay Heart Ornament Lesson
In this project, students will learn about patterns, have the opportunity to work with clay, and use an art technique called “crayon-watercolor resist.”
Grade Levels: I did this lesson with Lower Elementary (1st- 3rd grade), but it could be done with any age level.
Materials Needed:
We used Air Dry Clay for this lesson, but kiln fire clay would also work beautifully if fired and stained before gluing onto popsicle sticks.
Pony Beads + Wooden Beads for watercolor (optional)
Crayola Markers (washable)
Sharpies (optional)
Preparation:
Tape 8 popsicle sticks side by side using masking tape. Students will be asked to write their names on the back (see photo below). The masking tape can be used to hold popsicle sticks together until hot glue is applied. I hot glued them together with the two additional popsicle sticks glued across the top and bottom.


Day 1
To start this lesson we began our learning about the Native Americans, their culture, and their different methods of art making. I showed them several images of Native American blankets, and shared with them that these blankets are often made by hand, and given to families during a significant life event, or given as a symbol of gratitude. We shared a lot about gratitude, and what that means to us, as this lesson was given to them right before Thanksgiving.
We also talked about the different patterns used in the blankets, and how patterns can be created by repeating different shapes or colors.
I then asked them to use color Sharpies or Crayola Markers to create their own patterns on their popsicle sticks that would later be hot glued together.
We spent one 50 minute art class coloring and creating patterned designs on their popsicle sticks.

Day 2
The next art class we started the clay part of this lesson.
I read them the book, When Clay Sings, by Tom Bahti.
I then showed them how to use Aluminum foil as an armature for clay. It has an expansion rate of less than 2% which means it won't expand enough to crack your sculpt. You can use it as a core armature for figures, jewelry or anything else you are working on that has depth.
We first made our hearts out of aluminum foil, then we wrapped them in clay. Covering up the aluminum armature underneath with clay.

We also used this class time for students to choose up to five beads and one pipe cleaner to decorate and twist into handles for their artwork. Twisting the pipe cleaners around the horizontal popsicle sticks works well for a sturdy handle, but I hot-glued the backs, just to be safe that pipe cleaners don’t slip off in the years to come.
We then set the clay hearts onto their already made (with names already on them) popsicle stick base on the drying racks to dry. This helps us so much to know which clay hearts belong to who.
We spent one 50 min art class reading a story about the Native Americans and clay, creating our aluminum heart armatures, wrapped them in air-dry clay, and finally students beaded and twisted their pipe cleaner handles.
About 24 hours later, when clay hearts are dry and hard, I used Elmers All Purpose Glue to glue hearts onto the popsicle stick base. When students return to the art room, they will already glued on and ready to paint!

Day 3
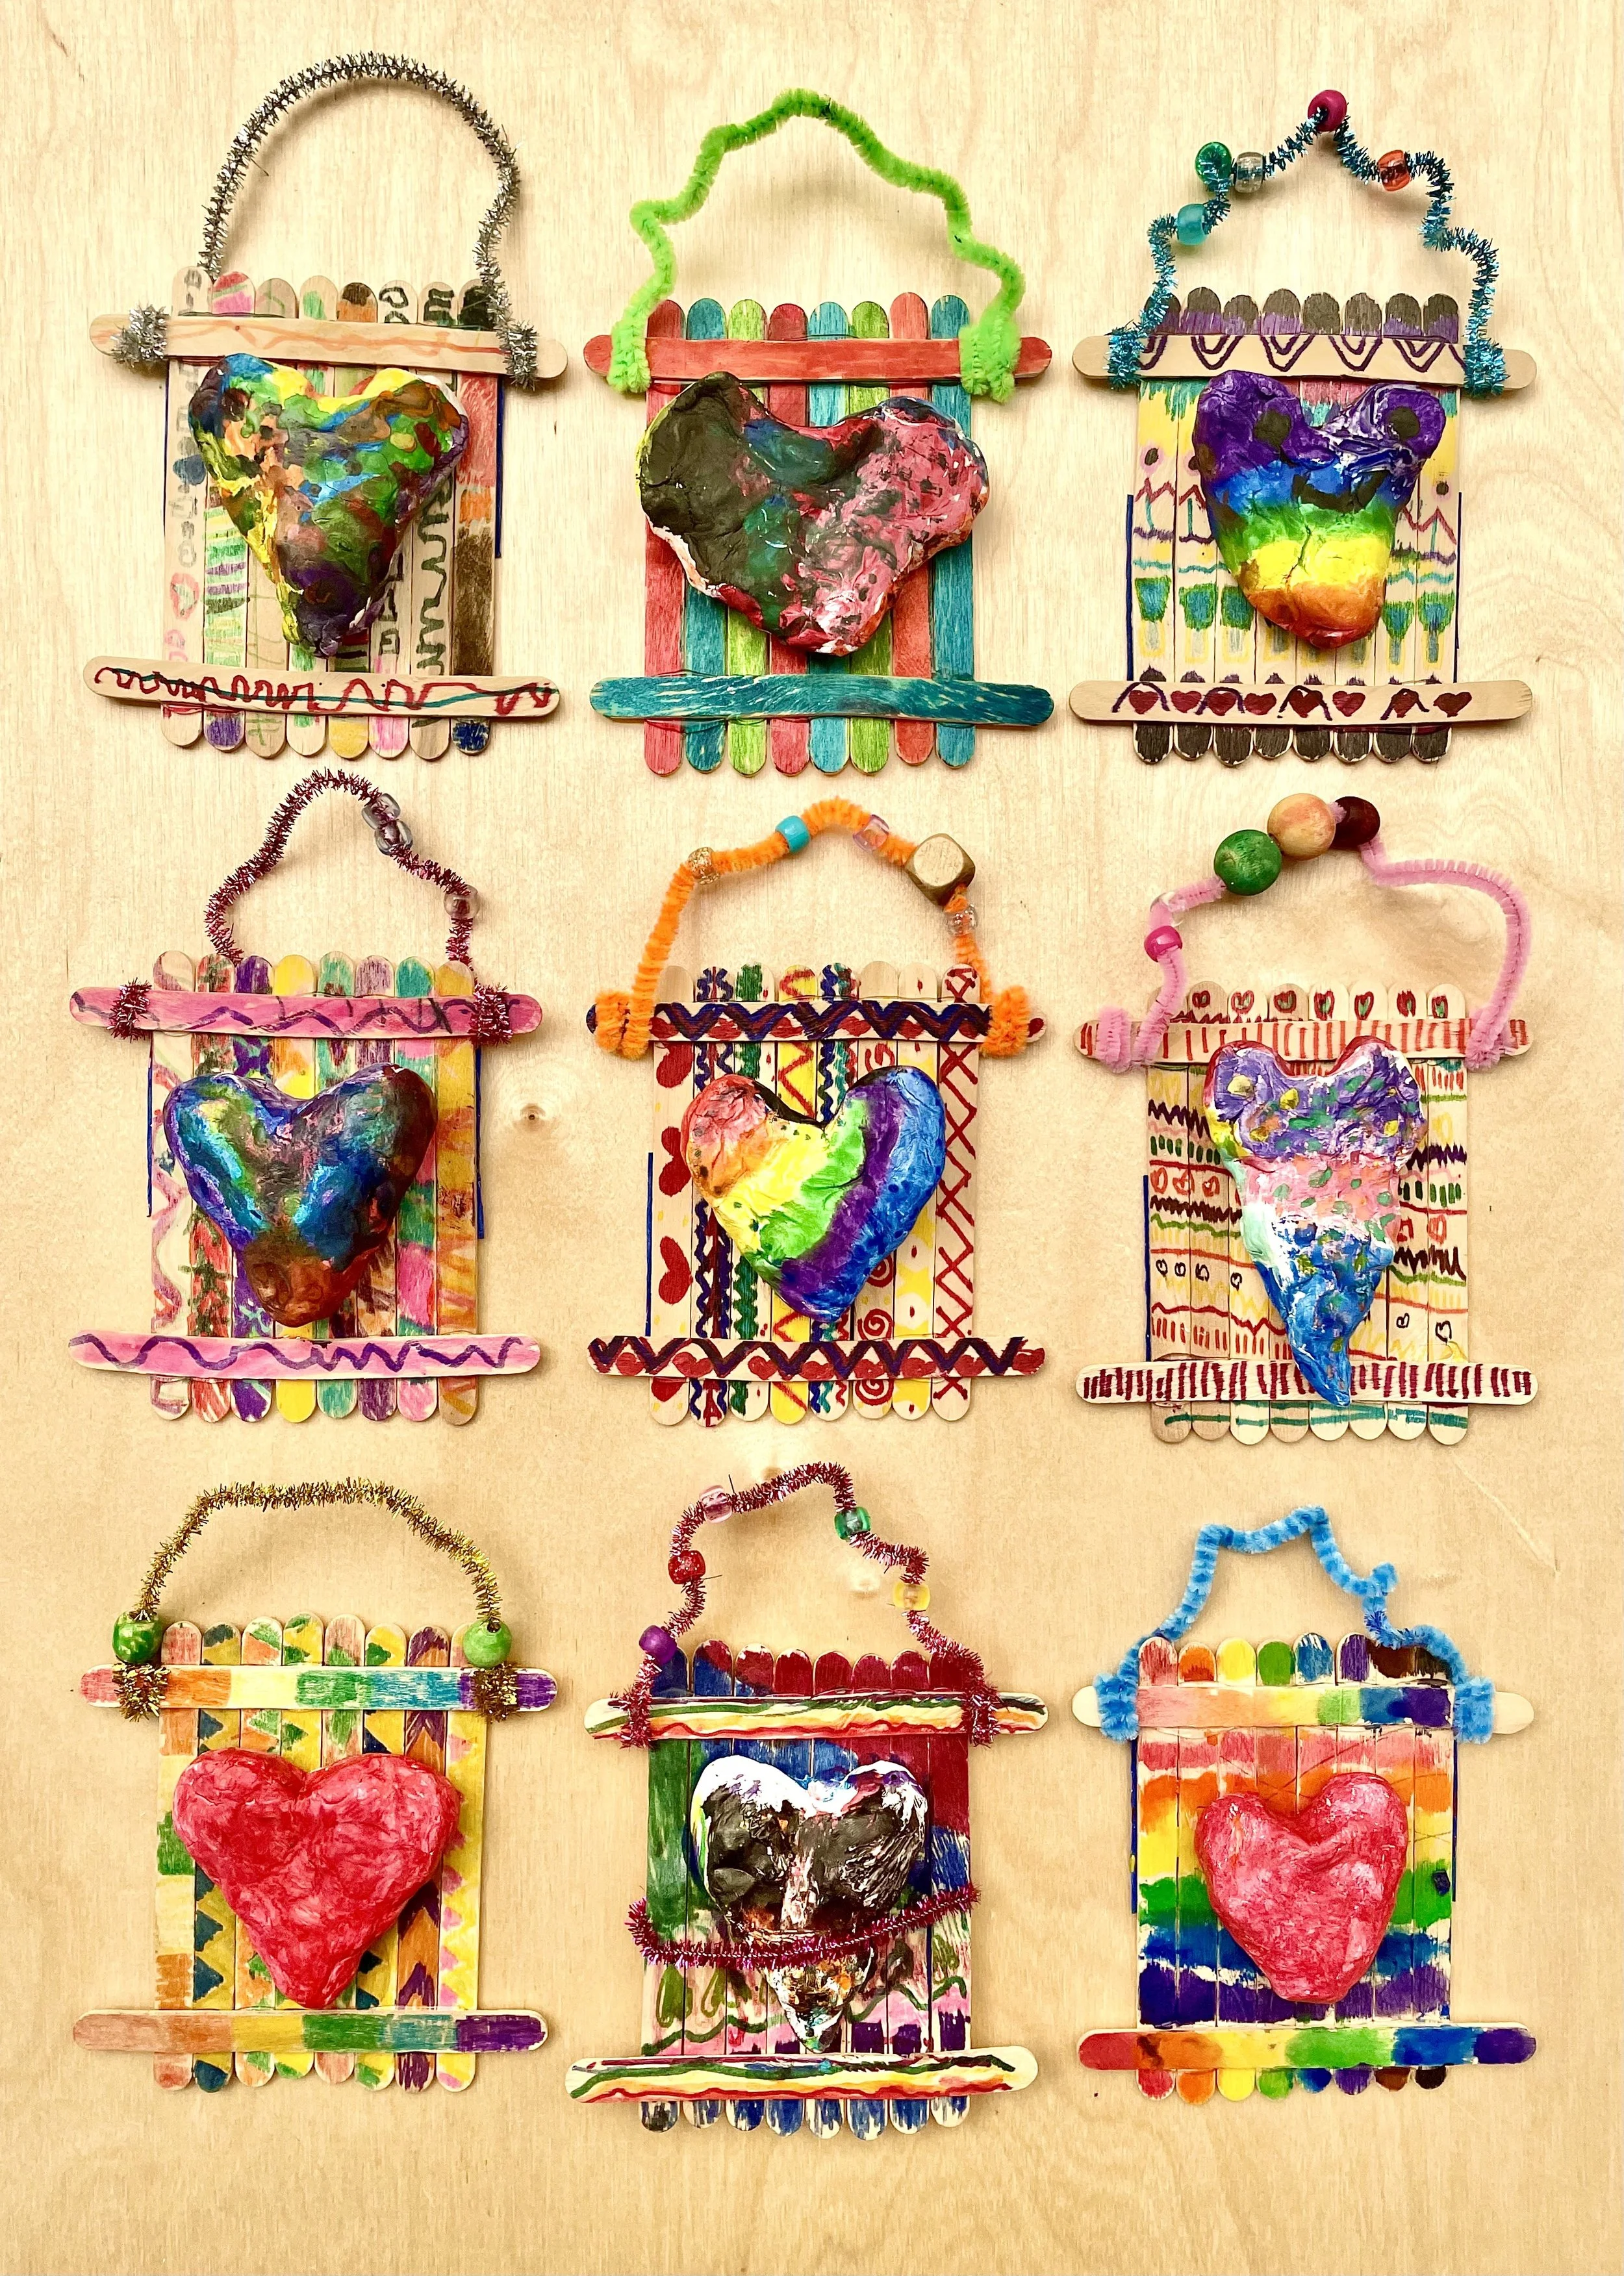
On the final day we finished these clay heart ornaments by coloring them first with crayons and then painting them with watercolor for that beautiful “watercolor crayon resist” effect! I think they turned out beautiful and the students were REALLY proud of them! I also love this is an artwork that should hold up to the test of time. I enjoy creating artworks with students that will last for significant years to come. Students signed their names on the backs with Sharpies, after removing the tape. Some of them plan to use these for ornaments for their Christmas trees, so they put their name and year on the back.


Have you tried this lesson or a lesson like this one in the past? I’d love to hear your feedback and what worked best for you! Feel free to leave a comment below. Thank you for looking!